Tag Archives: vintage

All the ruffles

It all started with a Sachin & Babi dress that I fell instantly in love with. At that point, I wasn’t truly intending on making a dress, but I couldn’t stop thinking about how I would do it, if I ever decided to go ahead with it. I actually had the most perfect fabric in my stash already, which is rare, because I keep my stash pretty small. Every now and again, I purchase something on whim. It was how I ended up with several yards of the most beautiful sheer silk in shades of green. It will be a special occasion when I finally use it, and hopefully for my eldest daughter, as it was her hair and skin colouring that inspired me to buy it in the first place!

So, using my special fabric was out of the question. But I still couldn’t stop thinking about it. I started toying with the idea of refashioning another Archer in my wardrobe (my other ruffle refashion was an absolute winner!). But then I realised that I had enough of the vintage sheeting to simply start a dress from scratch.

I’d love to say that I had a pattern for this dress, but I made up a lotof it as I went along. It wouldn’t be hard to replicate though. All you need to know is how to make a flounce. You could use any princess seamed sundress pattern.

I started with a self-drafted, princess seamed dress bodice that I often use as a sloper. However, I’ve been doing a lot of swimming over the past year and I’m finding that a lot of my old memades aren’t fitting me so well anymore. My bust measurement has grown by a whole inch, unfortunately not my actual bust, but rather through my side back (the old latissimus dorsi). I ended up letting out the side seams under the arms but keeping the waist measurement the same. It worked perfectly. I also raised the neckline a little and brought the shoulder seams in towards the neck.

As to the ruffles, they are simply flounces that were measured and inserted into the princess seams. It was a little fiddly but perserverence paid off. I love the black insets on the front and back of the bodice, but I have to confess that these design features were the direct result of freestyling my sewing (forgetting a seam allowance) and having to fix the problems. The same happened with the skirt. I ended up recutting several panels more than once. First, I cut the skirt as one, but it didn’t look right without any flounces.  So, I seamed it down the front and back but followed the grainline for those seams. As soon as I inserted the first flounce I could see that it wasn’t going to work. I recut the skirt pieces with the seams parallel to the side seams. This makes the flounces fall in a nice bell shape with is prettier than straight lines down the front and back.

This dress is very ruffly! It has a lot of volume through the front bodice and the skirt. I’m fully aware that this is a style that wouldn’t work for everybody. It works well for me. I’m small busted, so the front ruffles add interest and size to the top. My body is somewhat triangular in shape, moreso as I get fitter and stronger. I don’t like emphasizing this shape, so having a bit of added body through the skirt creates the illusion of a more hourglass figure. Sewing is great because you can really play around with design to flatter and create illlusions!

And before I sign off on this dress, I just want to mention a couple of hashtags that I’ve started to use on instagram: #sewingstrong #sewstrong

All body types out there have their own sewing challenges. I can immediately think of patterns that are drafted for bigger busts, for pear shapes, and for petites. I’m not saying one is more challenging than the other, but simply that I have a harder time thinking of patterns that are drafted for tall ladies, small busted ladies, or very athletic shaped ladies. If you know of any, let me know! I would particularly love to know what patterns are working for ladies with broader backs, or strong shoulders. I know that I’ve occasionally turned to men’s shirt patterns, and Thread Theory’s Henley is an awesome fit on me. I’ve also been paying more attention to what Sallie sews lately, because I know if a shirt pattern fits her, it will probably work for me too. I’m hoping that this hashtag will be an easy way to pull up ideas for sewing patterns and flattering designs that work well on a strong female body. If you’re someone who struggles with fitting tops and dresses to a broader than average back, or strong shoulders, jump in and tag along.

Plaid oversize top

This is the kind of top I wear a lot in Spring. It’s oversize enough to wear as a sweater but it also looks fine as a top.

I used an old pattern in my stash. I suspect it may have started out as Simplicity 1366 but has been modified within an inch of its life. I know I changed the neckline shape, added a collar (which I can stand up if I like), dropped the shoulders, adjusted the shoulder seam slope, widened the sleeves, and changed the armscye. I also modified the hem and added side slits. In fact, it would be a disservice to you all if I were to still call this Simplicity 1366…

In any case, I’ve made this top twice before, and worn them both to death. One has a shoulder seam zipper like this one and has since been demoted into a painting smock. The other was made in a stable knit fabric and has become my go-to gym sweater. It’s nice to have another version that is respectable enough to wear in public again.

The fabric is an unknown wool blend, thrifted from an estate sale many months ago. It is double-faced and launders beautifully, but it creases a little. Perhaps it contains a bit of cotton?

Vogue 9043 in classic black

This is my first coat of the season. I’m still debating with myself over whether I’ll sew another this year. I know there’s time. I have the fabric. There’s a few months of coat weather ahead of me here. I’m just not entirely sure that I want to build further on my own Winter wardrobe this year, or perhaps wait until next year when I’ll definitely need it more.

Meanwhile, I’m glad to say that this little black coat is going to get a lot of wear. The pattern I used was Little Vogue 9043. I cut View B in a size 8 for my very tall seven year old. The black wool coating and silky vintage lining was all thrifted from estate sales, aquired several months earlier. The buttons were excrutiatingly picked out from Joann’s by the littlest sister, specifically for Miss Seven and this coat. In equal parts, they are the cheapest, and yet most expensive buttons I own, and yet so much selfless thought and true love went into their selection that I just couldn’t say no.

The size 8 fits Miss just-turned-Seven reasonably well right now, but at the rate she’s growing, I’m not convinced she’ll fit into it next year. Of all my girls, she’s probably built the most similar to me; tall and slim, with broad shoulders (great for swimming ;-)). She doesn’t measure up as a size 8 through the chest, but her shoulders are broader above this. I know (from personal fitting experience) that if I sew a pattern to fit her bust/chest measurement, the shoulders won’t fit without adjustment. An easy kid-fix is to simply size up, as I did with this coat. It fits her perfectly across the shoulders, but there is extra room through the chest area, and a lot more ease (than intended by the pattern design) at the waist and hips. There is also extra length in the coat, but that actually works well in our favour. The fit isn’t perfect, but it is perfectly acceptable for a child and a child’s Winter coat at that.

She’ll get a lot of wear out of this coat over the next three months. The wool coating is thick, but it’s probably still only best suited to Spring here. It would be a perfectly suitable coat for Winter in Australia though.

Before I sign off on this one, I should also mention the beautiful lines in the design of the pattern. It’s one of the reasons why I love Vogue patterns and why I was drawn to making this particular one. It’s a little hard to photograph the details in black fabric, but the pockets are integrated beautifully into a princess seamed bodice. The two-piece sleeves are also shaped so that they curve forward.

I love the classic, dressy shape of this coat. It will be a very nice coat to keep and hand down to the last daughter (assuming it survives the wear and tear of this middle child!).

Statement sleeves in blush silk

This has been my party shirt for the holiday season. I’ve mostly been wearing it with leather trousers, rather than these wool pants. There’s something so lovely and contradictory about pairing leather with silk charmeuse.

The pattern I used was Vogue 7604. The only changes I made were to lengthen the sleeves and body a little. I made my standard broad back adjustment. I also shortened the neck ties by about 6 inches on each side, because I simply didn’t have enough fabric. That bias cut collar and tie is a serious fabric hog!

There is a small amount of stretch in my silk (technically it’s called stretch silk charmeuse), which makes it very comfortable to wear. In real life, I’ve been wearing a thin, long sleeve, merino top underneath it, which makes it the warmest and most comfortable party wear ever!

The collar can be worn a few ways. I like it tied at the back best, but it can also be tied at the front, or wrapped around once with a shorter tie at the back. And suprisingly, those sleeves did not get dipped into any gravy. I did have to watch out for the pussy bow though!

Vintage Vogue 2915 // Orange is the new black

I am totally obsessed with orange right now. Instead of filtering by fabric type in my online shopping, I’ve been filtering by colour.

The fabric I used for this trench is an Italian stretch wool suiting that goes by the colour, “pumpkin”. It couldn’t be more appropriate for Fall. Originally, I had my mind set on sewing a trench coat in a heavy silk satin, but economics had me looking at poly satin instead (which I just couldn’t find the love for, or perhaps it wasn’t the perfect shade of orange). In the end, I was sensible and landed on some wool fabric and I’m very glad I did. Anything other than wool just wouldn’t get any wear here in the Midwest.

The fabric is a beautifully, weighted wool twill, with a significant amount of stretch in both directions. It’s not a knit, but its lycra content meant that I had to treat it like knit. Stabilising the shoulder seams and neckline was essential. I toyed with lining this coat (as per the original pattern), but I really wanted something casual, that I could throw on and go. And lining deinitely wasn’t necessary with this fabric. The wool is perfectly opaque and the underside is as respectable as the right side. In fact, the wrong side is smoother, which makes it suitable for resting against the skin. Lastly, I pretreated the fabric in the machine and dryer before sewing, so I can wash and dry it easily at home.

I used vintage Vogue 2915 with a few small modifications. I sewed a size 12 but adjusted the shoulder seams for a broader back. In retrospect, I possibly could have gotten away without this fit adjustment because of the fabric’s generous stretch. And in fact, a tighter fit through the shoulders (in a stretchy fabric like this) would have resulted in a more consistently nice shape in the sleeve cap when worn because the sleeve cap would stretch over the shoulders. In some of my photos (above and below), the sleeve seam has slipped off my shoulder and the sleeve cap doesn’t look great (because there is no sleeve head to support it). But in the two photos below that, the shoulder seams sit in the correct postion and the sleeve looks perfect. I guess this is also the thing with an unstructured, cardigan-style coat. Technically, the fit is good though, and at least I know that this pattern will fit me well when I’m ready to use it again and make it up in a stable woven.

Other changes I made to the pattern:

  • I lengthened the sleeves by 1 inch.
  • I ditched the collar and front yoke flaps as I felt they wouldn’t suit the casual drape of the front.
  • The front coat pieces have been made wider at the centre front (by about 4-5 inches), to create the front drape.
  • I skipped all front fastenings and the belt. The original pattern was double breasted.
  • I ditched the lining.
  • I drafted a wide facing for the neckline. I used a pretty silk CDC for this. Since I knew the facing would be visible at times, I turned it into a feature point. I used the same silk to line the pockets, sleeve bands, and epaulets.

This was one of those makes that just seemed to grow more involved as I got into it. I set out to whip together a quick trench coat without all the detailing. But once I got started, anything less than a bound buttonhole (amongst other things) just seemed unacceptable. And whilst on the topic of unacceptable, I can’t, for the life of me, remember if I pressed that hem or not… I think Netflix turned my brain to smush while I was blind-stitching it…so it’s back to the ironing board with this trench before I wear it!

A refashion fest

It is still quite warm here in Kansas City. In fact, today the heat was back in full force. But mostly, this time of year is gorgeous, with less humidity, cooler nights, and pleasant days. I’m still not inspired to get on with my coat-making, but I have been thinking about my Fall wardrobe plans.

I’ve been pulling out the sweaters and going through my wardrobe to look for gaps. One thing I also do between seasons is to assess the clothes I own and identify what I don’t like anymore (and what I can possibly refashion). It’s amazing how much you can do with existing clothes to update an entire wardrobe without purchasing/making a thing.

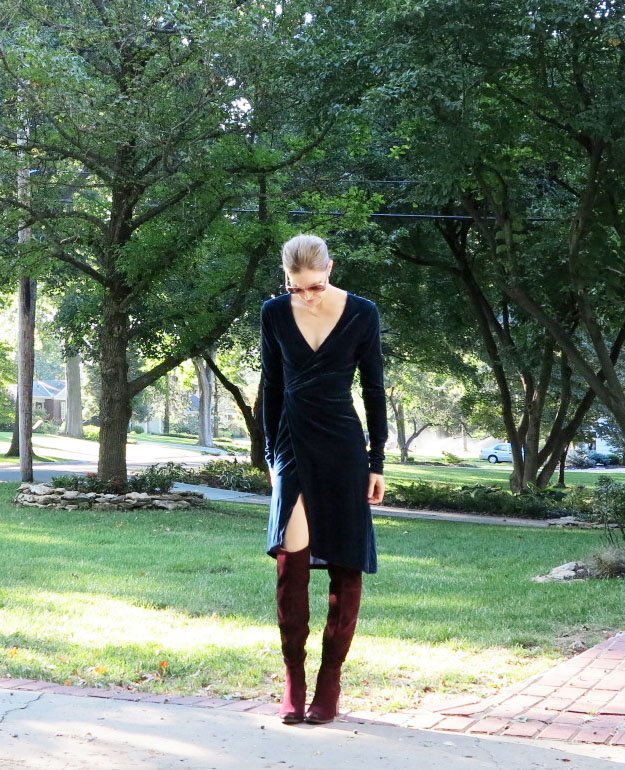
You’ve already seen the culottes that I narrowed to refresh into a boxier shape that is more current for this year. I also shortened this floor-length velvet dress. I LOVED the glamour of the maxi version and I wore it for the holidays last year, but my life doesn’t call for floor length gowns very often. I tried it as shorter dress but I still didn’t feel the love.

boots3 boots4

A little more cutting (and hand-stitching that hem for the third time!) and now it’s become a top that I’m really in love with! I’ll get tons of wear out of it in this version and the portions I cut off the dress can be reworked as a garment for one of my girls.

velvandj4 velvandj3

velvandj2

Slip dresses have had their moment this Summer, but they’ll also be great for going into Fall. Remember this dress? It was my go-to out-to-dinner dress over Summer, but I’m getting bored of the cold shoulder look (at every turn in my wardrobe anyway!). I cut off the sleeves and rebound the armscye, adding small spaghetti straps to drop the neckline a little. Now I have a slip dress that I can wear alone or layered with a turtleneck and boots.

biasslip1

I’ve also been playing around with layering. I dug out this old playsuit that I made using a vintage pattern years ago. Layering it makes for such a comfy and seasonally appropriate combo.

Even though I already liked this thrifted vintage dress a lot, it was a tricky one to wear in real life. The weight of the fabric meant it was way too hot for Summer, and yet the style doesn’t really suit colder weather. Converting it to a top has made it much more wearable for me, and the fabric is the perfect weight for Fall.

img_2794

I’m also a little in love with dramatic sleeves right now (same as always, right!). But instead of sewing myself a brand new top, I cut the cuffs off an existing shirt and drafted my own big, fancy cuffs to re-attach. This totally elevates the basic white shirt and is going to make my Fall layering just a little bit more… me. There’s a post about this refashion here.

fl3

And while I was at it, I trimmed back and re-bound the armscye of this pretty little top. The fabric is divine but I found the original shape a bit boxy/masculine with the wider shoulder seams. I think it will now work better with more separates. I’ll try to get some photos posted soon.

And finally, I’m also a little tired of the torn denim, bare knee jean, so I took an old vintage skirt and used it to patch up my white denim. These jeans are now so fun and I can’t wait to pair them with a snuggly sweater in the coming months. More photos coming soon on this one too.

It’s actually been a lot of fun finding and reviving hidden treasures in my wardrobe. Does anyone else attack their wardrobe with scissors between seasons?

A black silk cami

I was given a few lengths of some lovely crepe backed silk satin recently after my MIL had a big clean out. The fabric is probably quite old, but it is in perfect condition and of a beautiful quality. The smaller remnant was a gorgeous glossy black and I knew that it would make the perfect camisole.

fl10

Crepe back satin is much heavier in weight than charmeuse, with the lovely brilliance of satin on one side, and a dull, pebbly appearance on the underside. Normally, I’d prefer silk charmeuse for a slip or cami, but going into Fall, I knew this beefier silk would work well for layering over shirts, as well as wearing alone.

fl4

The pattern I used was the Camilla Camisole pattern. I made up a straight size 10 but lengthened it by about 1 inch. It is perfect. This is the third Camilla Cami I’ve sewn. I love this pattern. It stands out from the crowd because it is cut on the bias, which gives it an elegant fit that can easily be translated into both formal and day wear.

fl11

fl9

I made my first Camilla Cami in a Japanese poly and literally wore it to death a few Summers ago. I’ve recently started wearing my second version a lot more. I like the way it layers over a nice tee. And now, this classic black version is going to end up as another staple of my Fall wardrobe. I keep meaning to lengthen the pattern into a slip dress, but I find these little tops much more versatile, and great for using up small lengths of pretty silk.

fl3


A little Target knock-off for Miss Eight

Even though I sew a lot of clothes for my daughters, I’m not averse to shopping the Target clearance racks. I often find little gems there that I generally couldn’t make for the price on the tag (and this always takes a bit of pressure off my sewing to-do list).

The other day, I picked up a very simple, loose fitting top for Miss Six that Miss Eight immediately fell in love with also. My eight year old and six year old are very similar in size now and the top easily fit them both. All I had to do was rub off an exact copy for the older child.

coco1

coco6

The top is kind of a peasant style, but with little flutter sleeves and a front bodice with shoulder seams that swing around towards the back. The trickiest bit was navigating the angle of the shoulder seam and trying to determine the shape and depth of the armscye because in stretching out the elastic neckline to do so, I was also pulling the top out of shape. I came close to getting it right but I will have to angle the shoulder seam down more next time and raise the armscye. Otherwise, we’re all delighted with how the little top turned out.

coco5

I used my leftover vintage voile (from this dress). It’s very sheer, so she’ll wear a nude cami under the top. On the topic of kid undergarments, I bought her a few of these camisoles the other day (no affiliate link, I just think they are a great product). They are beautifully smooth and fitted, with little adjustable spaghetti straps; an exact, mini version of something I would wear. They are a more elegant option than the traditional singlet for an eight year old and I think this “grown up” appeal is why they may actually get worn. I bought them mainly to be worn as an extra layer during Winter. They’d be easy to sew, but y’all know how much I love sewing staples…

coco2

The shorts are a little version of my Cartwheel Shorts pattern that I made without the front pleats for a little less volume. I used my leftover vintage linen/lace tablecloth (seen also here). I think these shorts look adorable on her. If you follow me on IG, you may have seen the matching pair that I made for Miss Six too. She’s very proud of her artwork!


Vintage lace cold shoulder ensemble

You’ve seen me sew up a few cold-shoulder garments this season. I love them! I particularly love this style because it is cool, loose-fitting, and not at all restrictive. It’s become my go-to style this Spring.

ll3

ll4

ll5

ll2

The fabric came from a vintage, linen tablecloth. Beautiful linen tablecloths are at every estate sale here in Kansas City. I’d like to say, “a dime a dozen”, but they are never ever a dime. They are usually priced anywhere from $10 to $150. I loved this one as soon as I saw it, but I wasn’t prepared to buy it at full price. So I crossed my fingers and went back to the sale on the last day and bought it for $40 (50% off). It’s a huge tablecloth (2m by 4m) and the linen is of a beautiful quality, without any stains or tears. It is densely woven, with a fine texture, and quite opaque, but still lightweight enough for garments. In  my opinion, it was a steal.

ll9

I didn’t stop at the top though. I also made myself a pair of matching shorts, inspired by the one and only Sophie (Ada Spragg). I still have a lot of leftover fabric. This is the tablecloth that never stops. And the best bit about it is the very ample lace edging. I love the look of the lace, but I also love the fact that incorporating it in as the hem of a garment makes for a very quick sew (no hemming!!!).

lla5

lla4


DIY ponte and lace bodysuit

I find the idea of muslins for stretch knit garments a funny thing to get my head around, especially in the case of swimsuits and bodysuits. Personally, I don’t have any stretch “muslin” fabric lying around, and yet, none of the stretch fabric I own is particularly precious. And then there’s the fact that only a tiny bit is required for the suit anyway. I usually opt to make a wearable muslin in a case like this, even though I may end up making it up again as a real version, in exactly the same fabric!

6

This bodysuit is a wearable muslin. It’s a shape and fit that I haven’t made before so I was entirely unsure as to how it would work out. I used a few of my swimsuit patterns as a guide for the body shape and length, and then adjusted the size according to the less stretchy ponte fabric that I was using. The bottom of the bodysuit has a pant shape similar to my Splash Swimsuit.

5

4

I ended up having to adjust the side seams quite a bit before I was happy. I also completely re-designed the back halfway through construction. And that’s why you can see that the lace on the back has been finished with FOE on the top edge, but all the ponte has raw edges. Ponte won’t fray, so it was always my intention to leave the edges raw in this version (the lace was a different matter). I’ll spend more time finishing the shoulder straps and neckline next time round. I may still leave the pants unfinished though because the unfinished edges on the legs give a very smooth finish against the skin and under clothes. You’d be seeing a panty line in my jeans if the edges were finished with elastic.

11

I totally love this look of black on black for Summer right now. In my mind, it’s a little bit 90’s,  especially when you also consider the return of chunky, blocked heels (that are so comfy, but oh so reminiscent of dancing through the night to George Michael music videos with his bevy of supermodels). The nineties were the first real era of fashion that I lived through and actively participated in (it doesn’t count if you were too young to buy your own flouro socks and hypercolour T’s in the 80’s!).

15

Top: Made by me / Leather skirt: vintage / Jeans: James Jeans / Shoes: Loeffler Randall