Tag Archives: ruffles

All the ruffles

It all started with a Sachin & Babi dress that I fell instantly in love with. At that point, I wasn’t truly intending on making a dress, but I couldn’t stop thinking about how I would do it, if I ever decided to go ahead with it. I actually had the most perfect fabric in my stash already, which is rare, because I keep my stash pretty small. Every now and again, I purchase something on whim. It was how I ended up with several yards of the most beautiful sheer silk in shades of green. It will be a special occasion when I finally use it, and hopefully for my eldest daughter, as it was her hair and skin colouring that inspired me to buy it in the first place!

So, using my special fabric was out of the question. But I still couldn’t stop thinking about it. I started toying with the idea of refashioning another Archer in my wardrobe (my other ruffle refashion was an absolute winner!). But then I realised that I had enough of the vintage sheeting to simply start a dress from scratch.

I’d love to say that I had a pattern for this dress, but I made up a lotof it as I went along. It wouldn’t be hard to replicate though. All you need to know is how to make a flounce. You could use any princess seamed sundress pattern.

I started with a self-drafted, princess seamed dress bodice that I often use as a sloper. However, I’ve been doing a lot of swimming over the past year and I’m finding that a lot of my old memades aren’t fitting me so well anymore. My bust measurement has grown by a whole inch, unfortunately not my actual bust, but rather through my side back (the old latissimus dorsi). I ended up letting out the side seams under the arms but keeping the waist measurement the same. It worked perfectly. I also raised the neckline a little and brought the shoulder seams in towards the neck.

As to the ruffles, they are simply flounces that were measured and inserted into the princess seams. It was a little fiddly but perserverence paid off. I love the black insets on the front and back of the bodice, but I have to confess that these design features were the direct result of freestyling my sewing (forgetting a seam allowance) and having to fix the problems. The same happened with the skirt. I ended up recutting several panels more than once. First, I cut the skirt as one, but it didn’t look right without any flounces.  So, I seamed it down the front and back but followed the grainline for those seams. As soon as I inserted the first flounce I could see that it wasn’t going to work. I recut the skirt pieces with the seams parallel to the side seams. This makes the flounces fall in a nice bell shape with is prettier than straight lines down the front and back.

This dress is very ruffly! It has a lot of volume through the front bodice and the skirt. I’m fully aware that this is a style that wouldn’t work for everybody. It works well for me. I’m small busted, so the front ruffles add interest and size to the top. My body is somewhat triangular in shape, moreso as I get fitter and stronger. I don’t like emphasizing this shape, so having a bit of added body through the skirt creates the illusion of a more hourglass figure. Sewing is great because you can really play around with design to flatter and create illlusions!

And before I sign off on this dress, I just want to mention a couple of hashtags that I’ve started to use on instagram: #sewingstrong #sewstrong

All body types out there have their own sewing challenges. I can immediately think of patterns that are drafted for bigger busts, for pear shapes, and for petites. I’m not saying one is more challenging than the other, but simply that I have a harder time thinking of patterns that are drafted for tall ladies, small busted ladies, or very athletic shaped ladies. If you know of any, let me know! I would particularly love to know what patterns are working for ladies with broader backs, or strong shoulders. I know that I’ve occasionally turned to men’s shirt patterns, and Thread Theory’s Henley is an awesome fit on me. I’ve also been paying more attention to what Sallie sews lately, because I know if a shirt pattern fits her, it will probably work for me too. I’m hoping that this hashtag will be an easy way to pull up ideas for sewing patterns and flattering designs that work well on a strong female body. If you’re someone who struggles with fitting tops and dresses to a broader than average back, or strong shoulders, jump in and tag along.

Grainline Archer refashioned

Unless my memory fails me, this was the second Grainline Archer I ever made. I think I ended up getting the fit right on my third try. I still wore the original version of this shirt, but it’s become way too tight across my shoulders since my return to the pool.

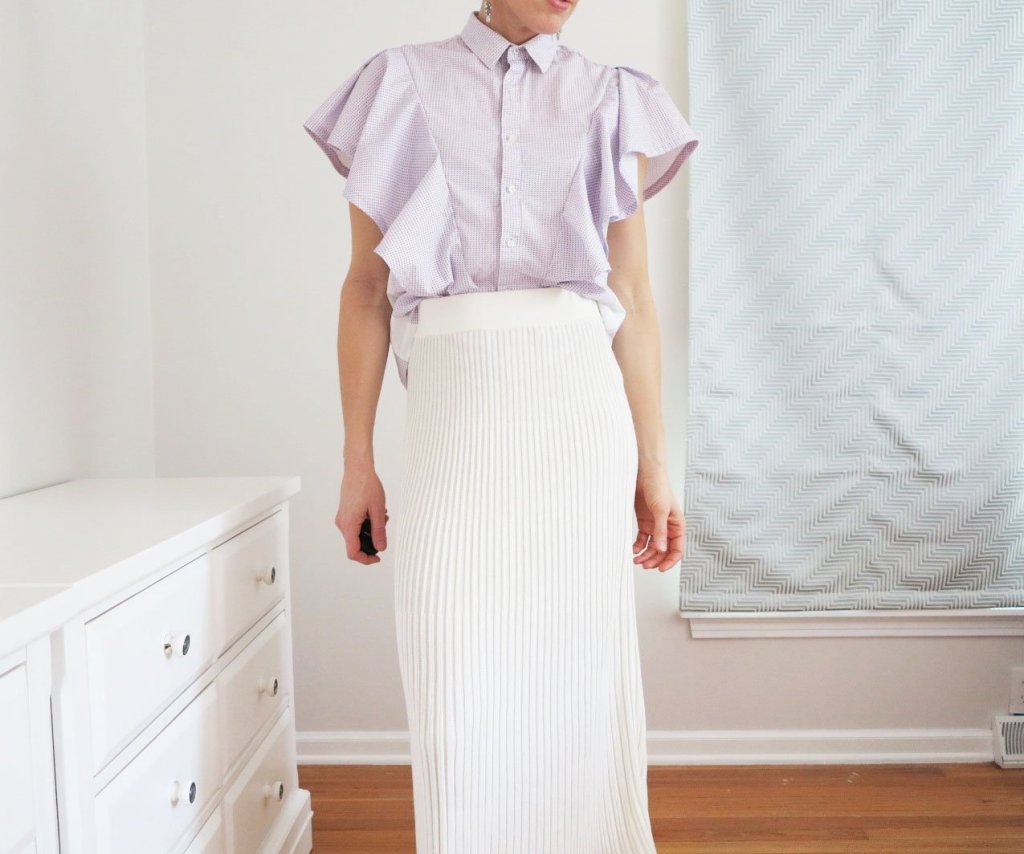
It was time to put this shirt to better use. I was lucky enough to have a decent sized remnant of the original fabric in my stash which meant I could go to town with my flounces. As beautiful as they are, flounces are very big fabric hogs!

I wish I took photos of my refashion during the process. I didn’t. However, I’ve drawn a few diagrams to help. It wasn’t a complicated refashion. I started by cutting off the sleeves of the shirt. Then I pencilled my intended seam on the remainder of the shirt. The diagram below shows the new seam I created. The front seam is red (on the front shirt pieces) and the back seam is green (imagine it on the back shirt pieces). Both are connected at the shoulder seam. I wanted the diagonal seam to be wider at the shoulder yoke seams and more medially placed towards the shirt hem. I brought the seam closest to the CF in the front of the shirt. The scariest bit was cutting along this seam and keeping both sides exactly even! After cutting, I then had three shirt pieces that I needed to stitch back together, taking into account the new seam allowances that would be eating into my shirt size!

For the flounce, I simply measured the entire length of the new seam and used that as a reference for the curved edge of a flounce. A flounce pattern piece is basically a big circle. I made mine a bit wider at the centre point (the area covering the shoulders). I also added an extra four inches (approx.) to the length of my flounce as I knew I wanted to add a couple of pleats over the shoulder region. The diagram below is an approximate representation of my flounce piece. Imagine it trued and smooth in real life!

I faced the flounce with self-bias-binding before I sandwiched it between the pieces of shirt. And once the flounce was attached and the shirt was in one piece again, I tried it on. I used 1cm seam allowances with my new seam so I knew that I lost exactly 8cm in shirt girth by inserting the flounce (2cm on each front and back seam). To compensate this, I decided to add contrast white panels down the sides of the shirt. This alteration in turn, would eat up another 2cm on each side of the shirt. So, I measured 8cm wide panel pieces to attach to the sides. The panel width is 6cm (incl. 2cm of seam allowances). These side panels returned the shirt to the same shirt-fit as before. I then bound the armscye and hemmed the bottom a little straighter and shorter than before.

I’m not joking when I say that this is my new favourite skirt. I’ve already worn it a lot. It pairs beautifully with skirts for an elegant evening look. But I also love it with jeans when I’m aiming for polished casual.

Cut out lace competition dress

I know I should sit on my competition entries like everyone else, but it’s like sitting on a hot potato, especially since I couldn’t wait to get started on this one. It’s finished, photographed, and I’ll be squeezing in as many wears as possible before Fall, so I figured I might as well share it! The inspiration came from THIS dress that I posted on my IG account a few weeks ago.

As soon as I saw the ivory lace, I knew exactly what I wanted to make with it. The only problem was that the rules stated that no trims could be used and that the outer fabric of the garment had to be made entirely of the competition fabric, and in a single colourway only. That was a big problem. The contrasting black trim against the ivory lace was the element that I most liked about my inspiration dress.

alace12

It took me a bit of thinking to come up with a solution, and a LOT of hand-stitching post construction. However, I found a way to keep all my black trim to the underside of the lace fabric and in a manner that I could reverse in the future. With the trim kept to the inside, the contrast is muted through the lace, but still visible as a subtle feature.

This is a post about my competition dress. I will share more pictures one day after I have unpicked all my handiwork to reveal the black trim again.

I designed this dress using a combination of flat pattern-making and draping. I tried very hard to design a bodice that would be low cut (and slightly shaped) in the back, yet with straps that would conceal my favourite bra. I think I did a pretty good job.

alace9

lace4

lace5

I also tried to position the lace in such a way as to avoid lining the bodice. I wanted the dress to show glimpses of skin through the lace rather than lining. But I also didn’t want the dress to be too revealing. The bodice isn’t lined at all but the ruffle provides a little extra coverage. The skirt has a short lining. I couldn’t quite manage to place the lace of the skirt in such a way that would cover my bottom completely.

The lining I used for the skirt is an ivory/beige coloured acetate. I gathered the lining in my dress rather than pleating it because I wanted to add a bit more bulk through the skirt. And that is the beauty of sewing your own clothes. My hips are narrower than my shoulders and this difference gets a little more pronounced the fitter I get so a gathered lining in the skirt helps me achieve an illusion of filling it out better and having a more hourglass figure. (I blame Pokemon, the Olympics, and active kids for getting me out running and swimming laps everyday this Summer!).

I made the straps using wide, black, foldover elastic (FOE). The gathered sleeves are sandwiched between the fold and then the entire length of the elastic is stitched down to create an enclosed strap. I used a very strong/stable FOE. Too much stretch would have made for weak straps, but a little bit of firm stretch and a lightning stitch creates very comfortable and strong shoulder straps.

download (1)

The sharp contrast of black against ivory in the shoulder straps was what my heart desired, but I compromised by using it as a strap lining instead. I created lace tubes to cover those black elastic straps and hand-stitched them in place. I’ll remove those lace tubes at a later date.

I also encased the edges of the lace ruffle in black, self-made, silk binding. I then turned that trim to the underside and hand-stitched it in place. I like that I can still see a glimpse of the black through the lace. To cover the very edges of the black binding (near the neckline and CB zipper), I cut tiny squares of the competition fabric and appliqued them over the visible binding. The result is a dress with outer fabric made completely of the competition lace.

alace2

lace7

alace6

I’m so pleased with how this dress turned out. I will definitely enjoy wearing it during the last few weeks of Summer. Meanwhile, there’s still plenty of time to enter the competition and if you don’t like ivory lace, there is also red and black to choose from. I have less than a full panel remaining of my ivory lace, but I think I’ve just worked out a way to scrapbust it into another little frock!

alace5